
Learn how to edit dashboards, move blocks, and build out custom visualizations.
Start by selecting the "add" icon next to boards in your workspace navigation.
A new, untitled board will be created.
From the board options menu, select "Edit" to bring the board into edit mode. Now you're ready to get building.
Navigating the block and metric browser
From edit mode you should notice a horizontal menu across the top of your screen. 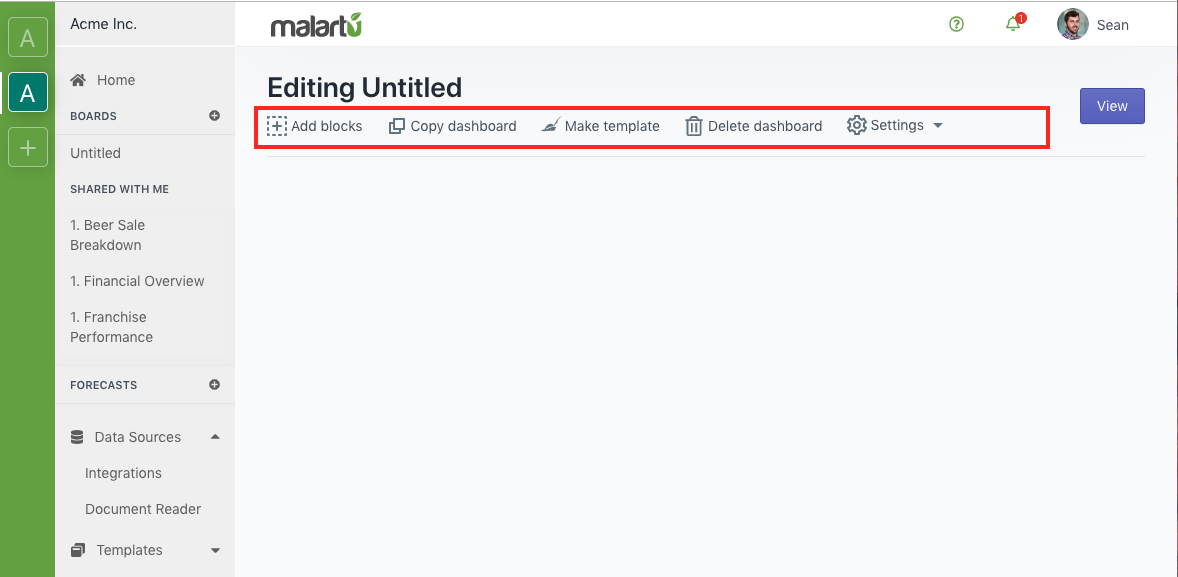
Select "Add blocks" to launch the block browser. The block browser contains a number of elements:

- Table: Select table to add a blank table to your board. Once the table is added, you can then select metrics to add to the table via the data browser.
- Sheet: Think of Sheets as blank spreadsheets where each cell can be assigned a data point. Sheets have a customizable number of rows or columns and allow you to view any organization of metrics in a single time period.
- Text: Select Text to place a text box on the dashboard. Text within this box can be formatted or transformed from the text options in your right-side menu.
Select the block you'd like to begin working with. Now you will see a dropdown appear horizontally at the top of your page. This is the metric browser.
Navigating the metric browser
Anytime you work with data, from adding metrics to blocks, to mapping data points in the document reader, you will navigate this data from the metric browser.
The first page of the data browser contains the following elements:
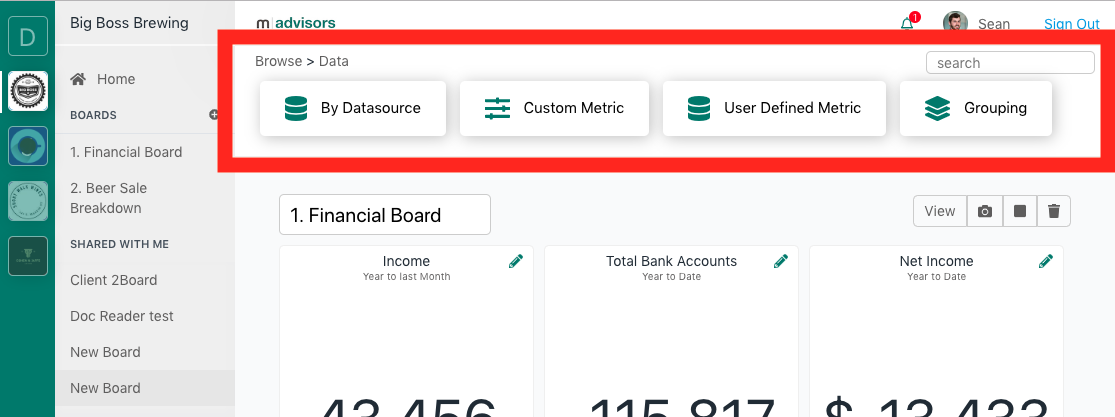
- By Data Source: Select this option to browse by data sources you have connected to this account
- Custom Metric: Select this to navigate to all custom metrics built in this account. If you have no created a custom metric, you can also build one here.
- User Defined Metric: Select this to navigate to all user defined metrics. User defined metrics are created custom by users and often describe data uploaded manually via the document reader.
- Grouping: Select this to navigate to any metric groupings you have created. Learn more about metric groupings here.
- Clients [Aggregate workspaces only]: For advisors, select this option to decide which workspace's data to work with. After selecting the workspace, you will see all the options from the screenshot above.